
Smart scan: how to use automated receipt processing (OCR)
Smart scan
Smart scan uses advanced Optical Character Recognition (OCR) to eliminate manual data entry. By capturing or uploading a receipt, the system automatically extracts key details like amount, date, and vendor, allowing you to create accurate records in seconds.
How to add an expense using OCR on desktop
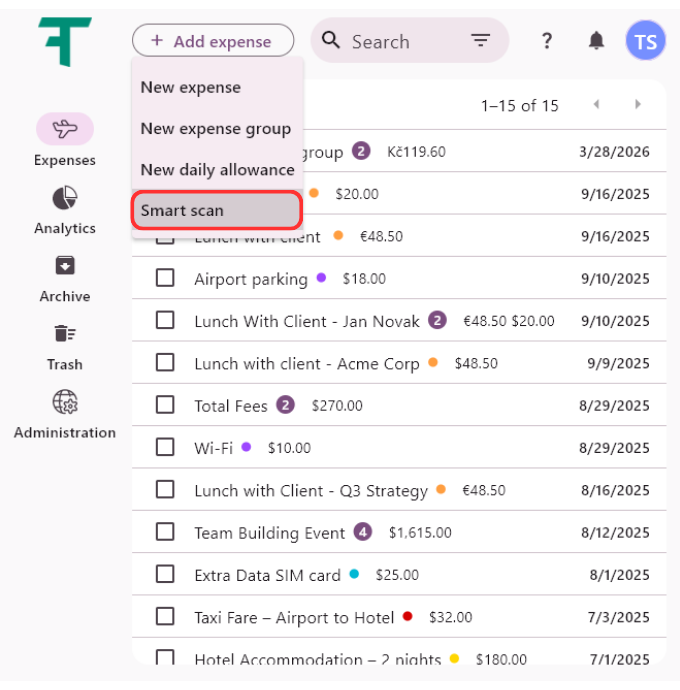
Click on Add expense and select Smart scan.
Select a receipt from the folder where you have it saved.

The system processes the image and automatically populates the expense fields.
Verify the extracted data, choose a name appropriate for your expense, and click Save to save it in the system.


How to add an expense using OCR on mobile
Click on Add expense and select Smart scan.

The mobile experience is optimized for high-volume handling and field speed.
Smart Auto-Capture: Point your camera at a receipt. The app automatically detects the edges and captures the scan without you needing to press a button. Continuous Scanning: As long as the camera remains pointed at a new receipt, the system will keep generating and stacking new scans. This is ideal for processing an entire trip’s worth of paperwork at once.

All your captured shots appear as thumbnails in the bottom-left corner. Tap the thumbnail to open the editing tools and adjust your scan before saving.

Adjust: Fine-tune the cropping and edges.
Filters: Enhance readability for better OCR accuracy.
Rotate: Correct the orientation of the document.
Delete: Remove unwanted or duplicate scans.
Done (top-left) — confirm your edits and return.
Retake (top-right) — capture the scan again if needed.

Once you click Save in the bottom-right corner, the system intelligently decides how to organize your data based on the number of scans:
If only one receipt was processed, the data is transcribed directly into a new individual expense.
If you scanned several receipts, the system automatically bundles them into a new expense group. This keeps your dashboard clean and ensures related costs (like a multi-day business trip) are structurally linked from the start.

Tips for Best Results
Place the receipt on a flat, well‑lit surface to improve OCR accuracy.
Double‑Check Before Saving: Quickly review the extracted amounts and details. The system does the scanning, but your confirmation ensures everything is correct.
Related articles
How to delete your account
Step-by-step guide on how to permanently delete your account. Learn what happens during the process …
Read MoreUsing analytics
Learn how to leverage analytics dashboards to visualize, analyze, and gain actionable insights from your …
Read MoreGetting started
Kickstart your Traverse journey with our easy-to-follow Getting Started guide.Learn the basics, set up quickly, …
Read MoreAdministration
Manage settings with ease: add and customize currencies, expense categories, and payment methods to tailor …
Read MoreOverview of user interface
Explore the user interface overview to familiarize yourself with key features,navigation, and layout. Get a …
Read MoreArchiving and deleting expenses
Learn how to efficiently archive your expense records to ensure secure storage, easy retrieval, and …
Read MoreWas this page helpful?