
Overview of daily allowances
Overview of Daily Allowances
The Daily Allowance section allows you to manage and automate per diem reimbursements for business travel.
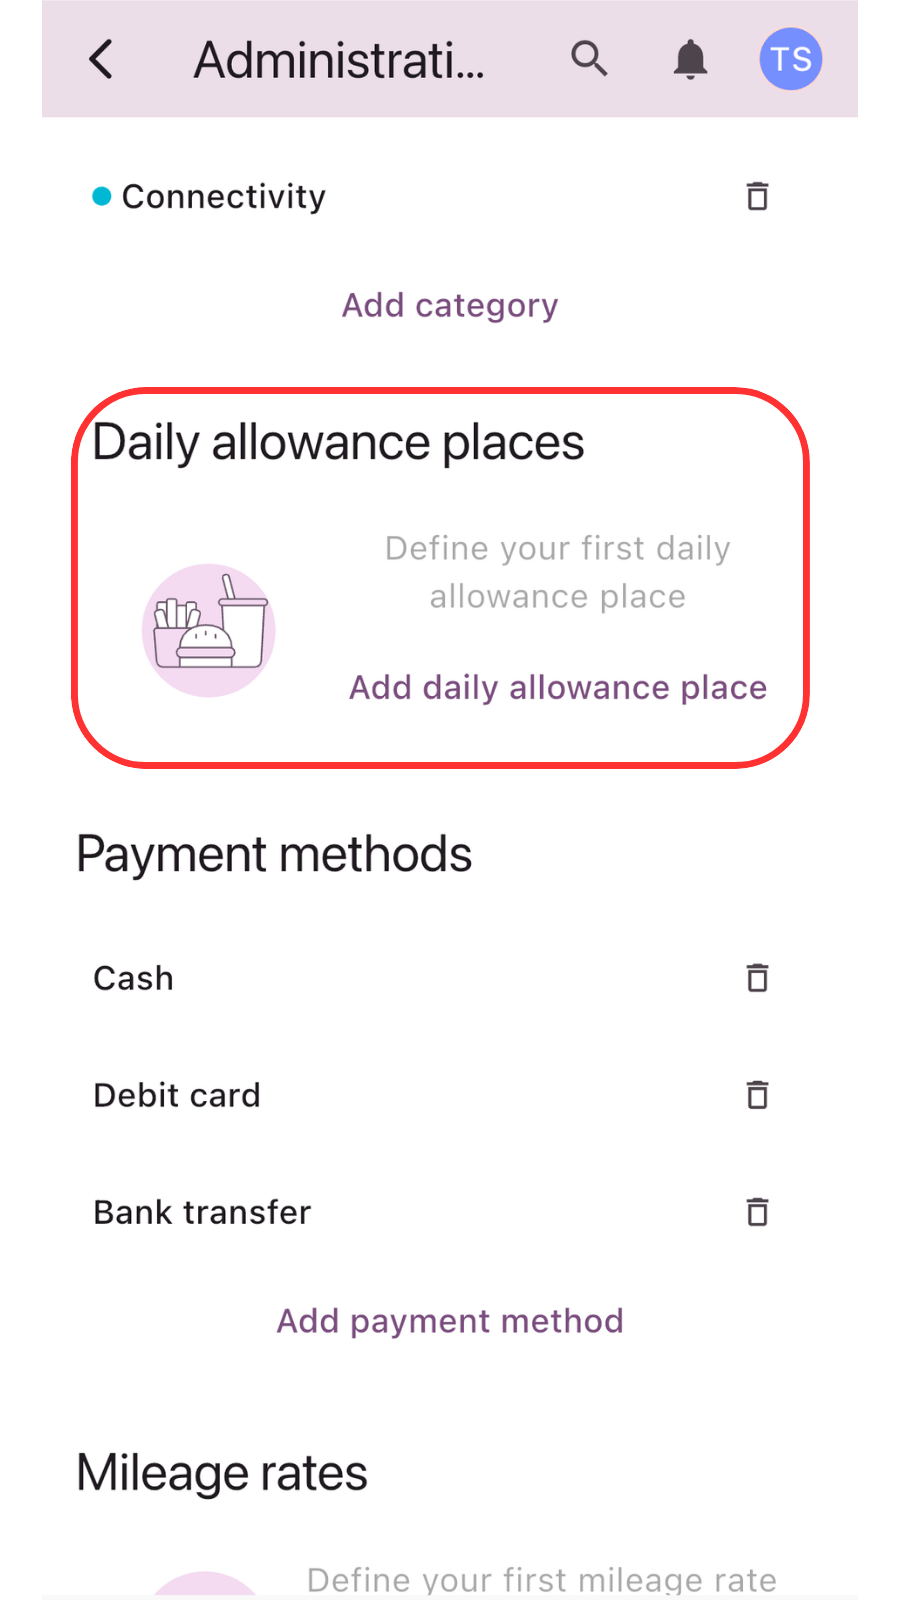
To use daily allowances, you first need to set up your locations in the Administration section.
Go to the Administration menu and click the Add daily allowance place button.
A new window pops up where you enter the Name of the place and then you can click Save.
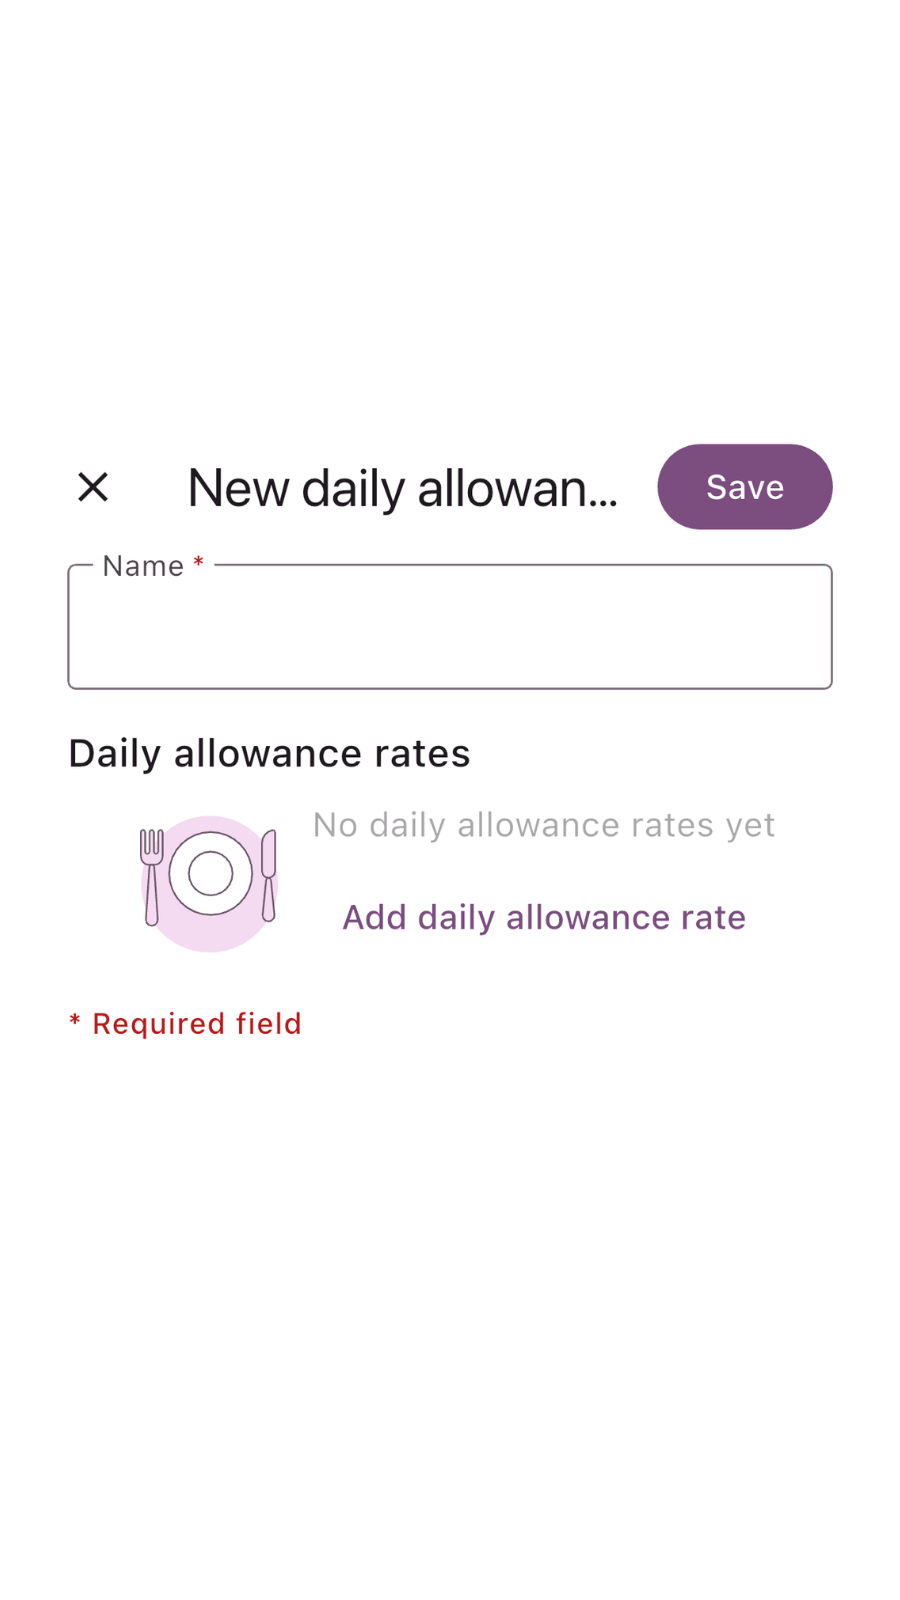
Or, before clicking save, you can click on the “Add daily allowance rate” button to set the amounts and choose the currency.
You can also set Part-day rates or Meal reductions for shorter trips.
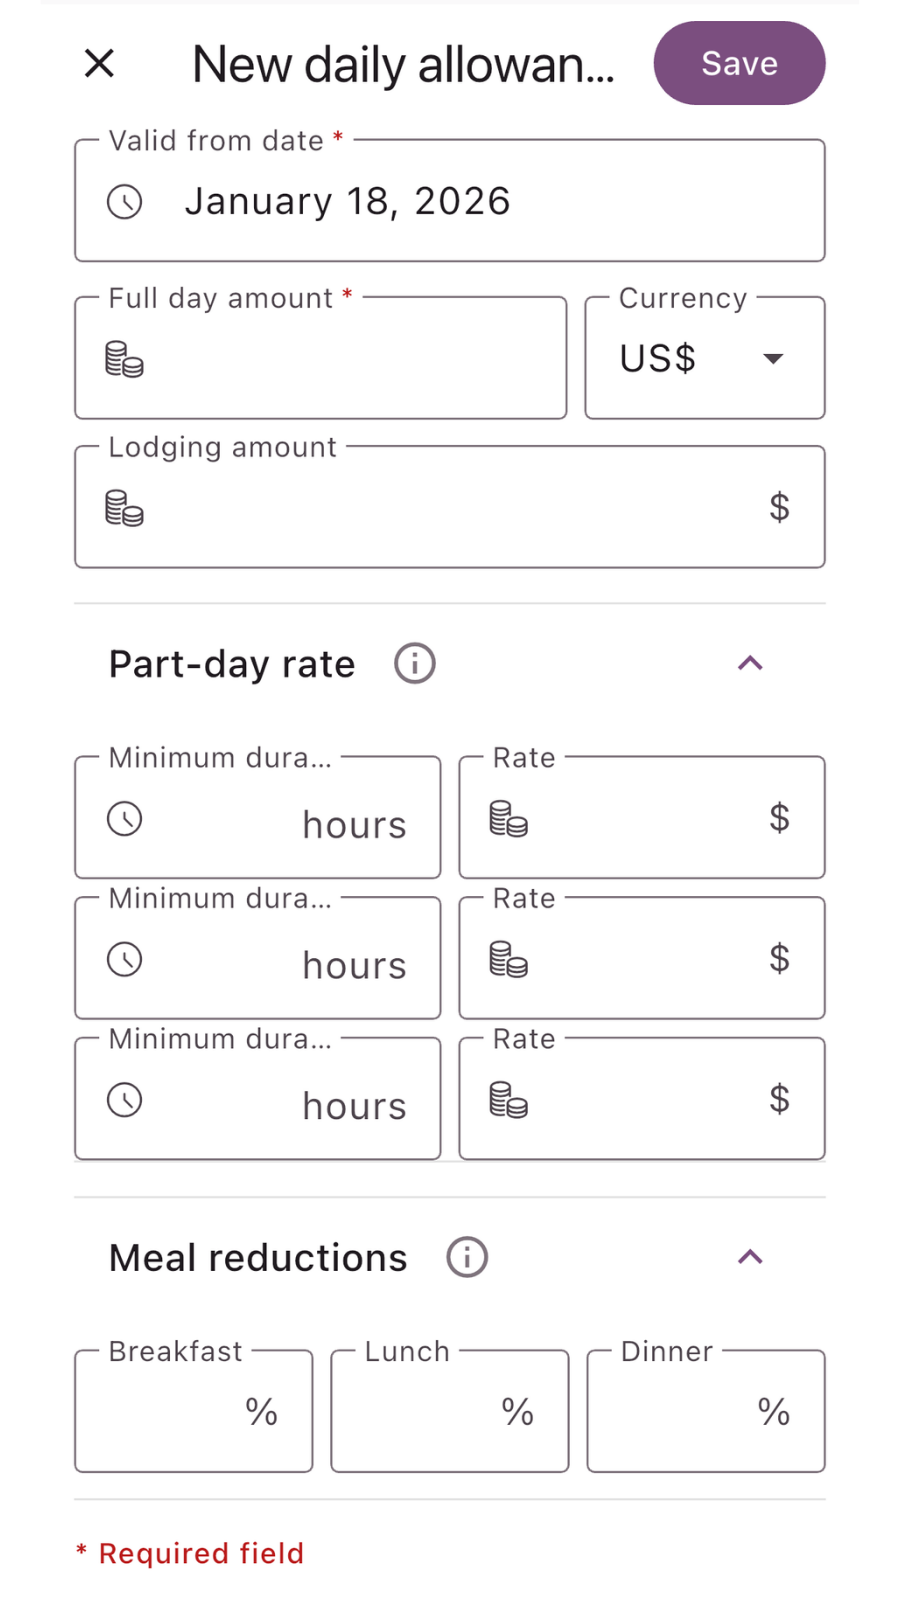
If everything is set as needed, then click Save.


Creating a new allowance
To create a new entry, click on the “+ Add expense” button and select “New daily allowance” from the dropdown menu.


Note: This button only appears after a place and rate are saved in Administration.
Trip details and rates
The main screen of the daily allowance form allows you to set the basic parameters of your trip:
- Name: Give your trip a title
- Full day toggle: Use this switch to quickly set a 24-hour duration or manually adjust the start and end dates and times.
- Daily allowance place: Select the location created earlier from the dropdown menu to automatically apply predefined rates and currencies.
- Include lodging: Check this box if the allowance should include accommodation costs.
- Estimated total: The system calculates the final amount in real-time based on the selected location and duration.


After you click "Save", your daily allowance is finished and stored in the Expenses section along with your other expenses. You can easily identify them because they are marked with a special icon in the list, making them stand out from standard receipts or mileage logs.

Related articles
How to delete your account
Step-by-step guide on how to permanently delete your account. Learn what happens during the process …
Read MoreUsing analytics
Learn how to leverage analytics dashboards to visualize, analyze, and gain actionable insights from your …
Read MoreGetting started
Kickstart your Traverse journey with our easy-to-follow Getting Started guide.Learn the basics, set up quickly, …
Read MoreAdministration
Manage settings with ease: add and customize currencies, expense categories, and payment methods to tailor …
Read MoreOverview of user interface
Explore the user interface overview to familiarize yourself with key features,navigation, and layout. Get a …
Read MoreArchiving and deleting expenses
Learn how to efficiently archive your expense records to ensure secure storage, easy retrieval, and …
Read MoreWas this page helpful?