
How to use expense groups
Expense groups
Expense groups allow you to group individual expenses under one common name. Instead of seeing ten separate expenses in your list, you will see one organized group, significantly simplifying approval and archiving processes.
Who is it for and why use groups?
This feature is ideal for managers and employees who handle:
Business trips: Keep all expenses (hotel, tickets, dinners) from one trip in a single place.
Company events: Bundle costs for teambuilding activities or conferences.
Project costs: Track all expenses associated with a specific client or contract if relatively small.
An expense group lets you see the total sum for an entire event, even if it includes multiple expense categories such as meals, lodging, or fees tagged individually by their category.
How to create a new expense group
The creation process is quick and intuitive:
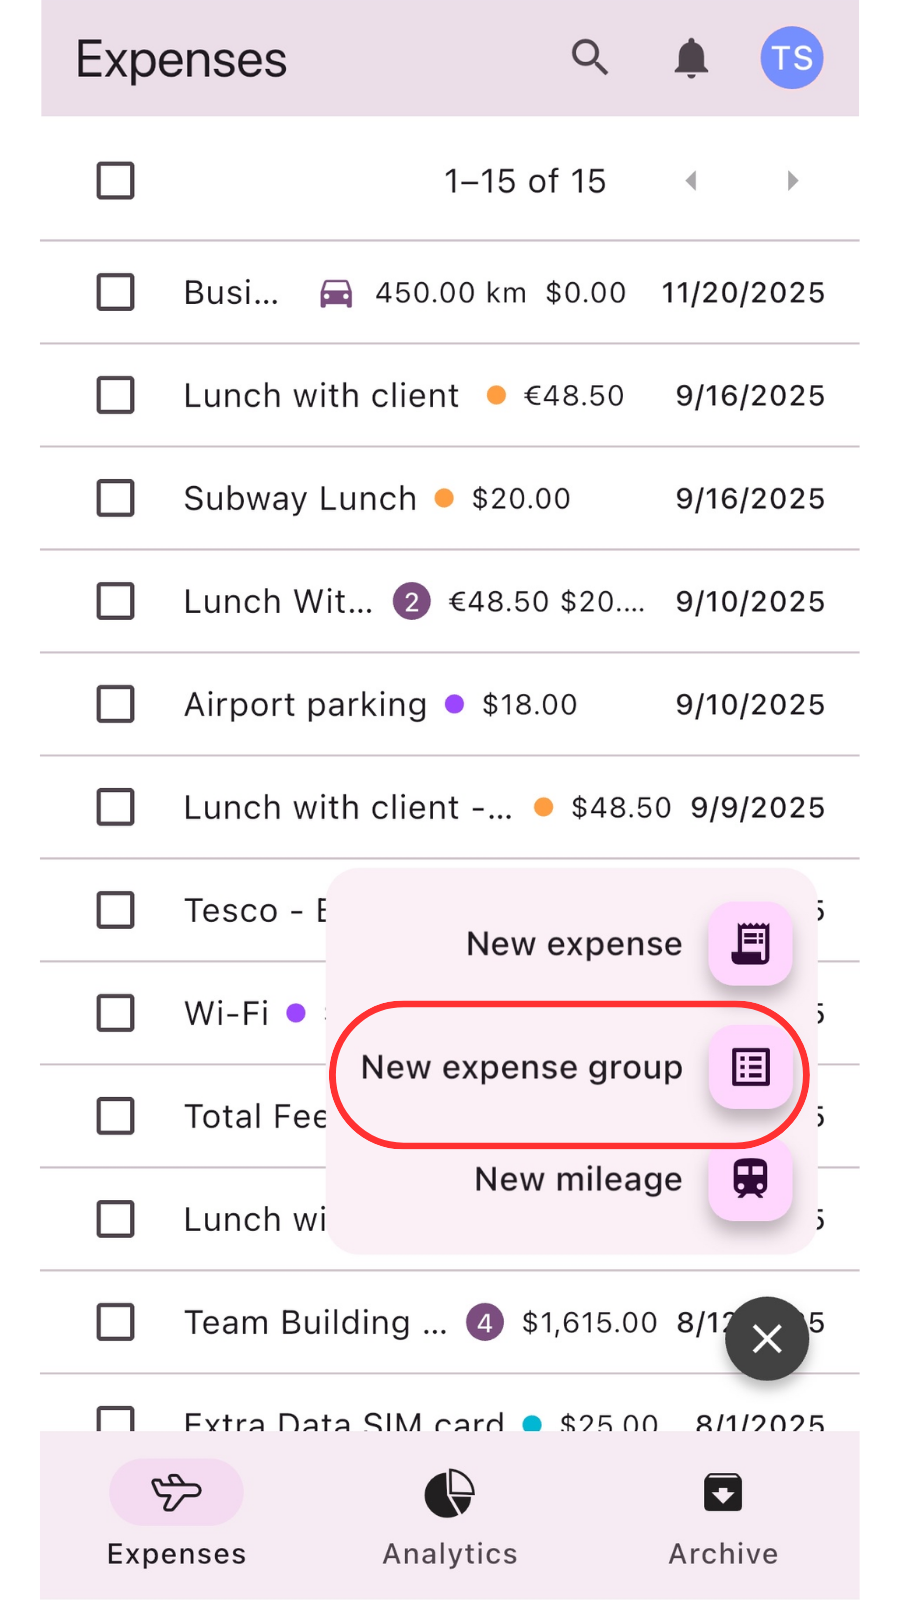
- In the main Expenses section, click the + Add expense button.
Select New expense group from the dropdown menu.
In the form, enter a Name for the group (e.g., "Team Building Event").
- Use the Add expense to start adding individual items to the group.


Managing items and receipts within a group
For each expense within the group, you can see its name, amount, date, and category.
You can attach any number of receipts at once in the Receipts section. Supported methods include uploading files, taking a photo, or selecting from your gallery.
The group automatically tracks the date range from the first to the last expense (e.g., from August 1 to August 12).


Identifying a group in the expense list
In the main expense overview, you can immediately recognize a group by its specific display:
Number of expenses: A number in a circle next to the group name indicates how many individual expenses the group contains (e.g., Team Building Event (4)).
Total sum: The system automatically totals the values of all added expenses and displays the total amount for the entire group in the list.


Related articles
How to delete your account
Step-by-step guide on how to permanently delete your account. Learn what happens during the process …
Read MoreUsing analytics
Learn how to leverage analytics dashboards to visualize, analyze, and gain actionable insights from your …
Read MoreGetting started
Kickstart your Traverse journey with our easy-to-follow Getting Started guide.Learn the basics, set up quickly, …
Read MoreAdministration
Manage settings with ease: add and customize currencies, expense categories, and payment methods to tailor …
Read MoreOverview of user interface
Explore the user interface overview to familiarize yourself with key features,navigation, and layout. Get a …
Read MoreArchiving and deleting expenses
Learn how to efficiently archive your expense records to ensure secure storage, easy retrieval, and …
Read MoreWas this page helpful?